5 stars reviews from dentists all around the world! ★ ★ ★ ★ ★
Recent Post
Archive
- October 2025
- July 2025
- November 2024
- September 2024

How and when to use bite ramps
Stephane Reinhardt
Bite ramps. Do you like them? Do you use them?
Bite ramps were introduced with the Invisalign® G5 protocol. Align Technology®, the makers of Invisalign clear aligners, comes up almost every year with a new protocol. They are constantly improving the product. It started with G3, then G4, G5, G6, G7, and now we’re at G8. Will the next be G-string? 😬


G5 protocol
The G5 protocol was introduced to improve how we treat deep bite cases and improve success predictability. There were a couple of new features in that protocol, and one of them was the bite ramp.
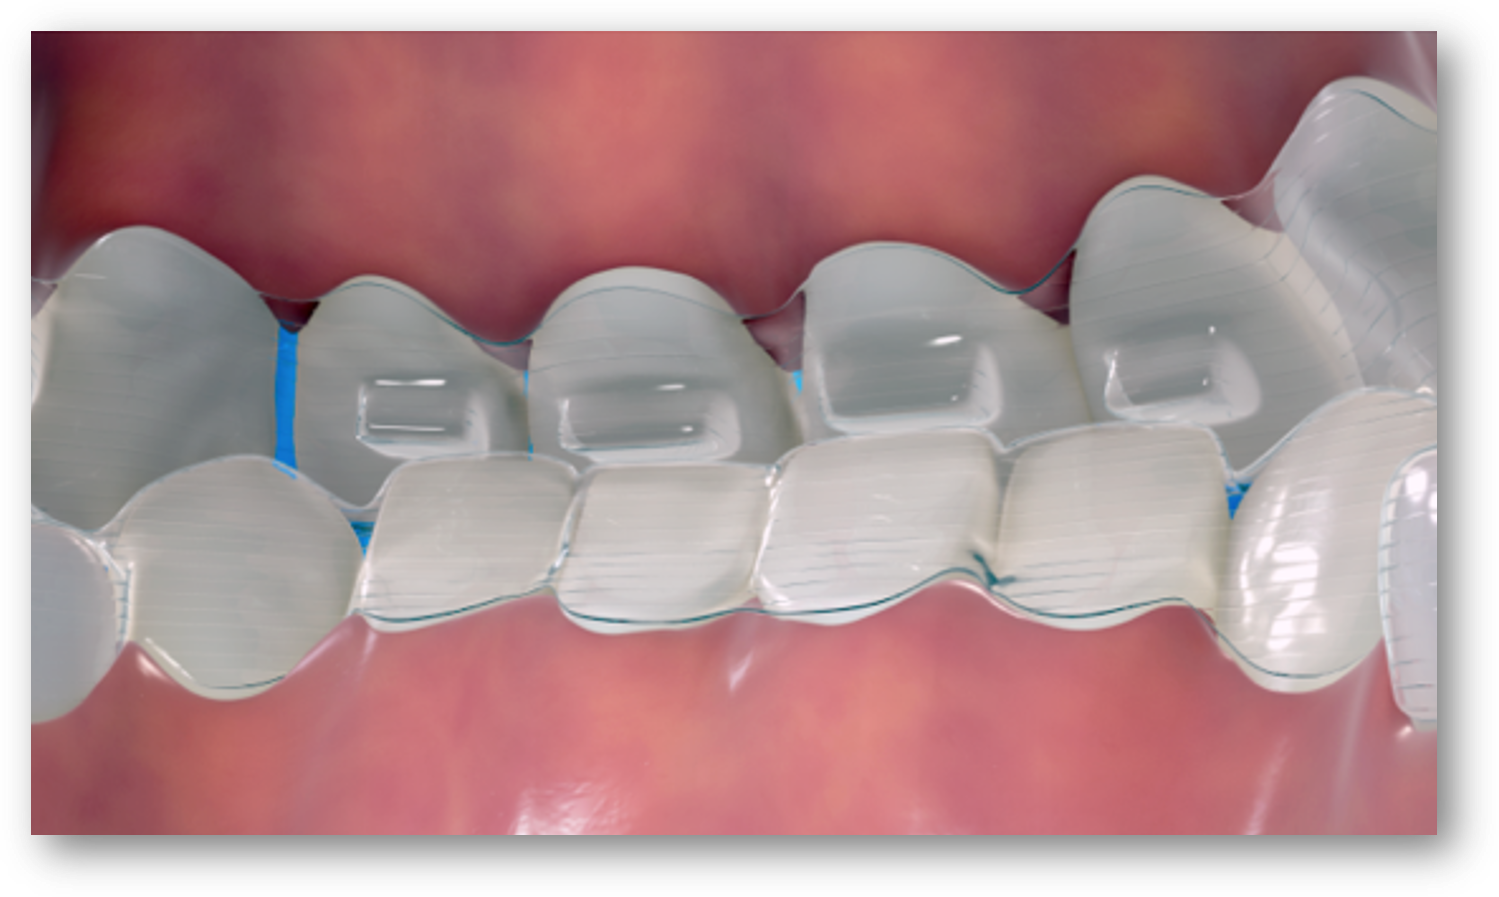
The idea behind the bite ramps is to disocclude the posterior teeth to relieve the pressure. Because often, we need to open the bite in deep bite cases, making sure there is no pressure on the posterior teeth. Depending on your treatment plan, you may want to intrude the anterior teeth, you may want to extrude the posterior teeth, or maybe you want to do a combination of both. It’s hard to extrude teeth: any vertical movement is complex with clear aligners! Especially extrusion. It’s challenging to extrude posterior teeth. To do it, to succeed, you need a good understanding of clear aligner mechanics. (for more on this, see the Basic Tooth Movement Mechanics course here)
The theory behind bite ramps
Think of patients with really big masseters who would bite all the time and put significant pressure on the molars. They would be working against what you’re trying to do with the teeth. The idea with bite ramps is to disocclude the posterior teeth to relieve this pressure and then extrude the posterior teeth like it is planned in our treatment.
We like the idea. The theory behind it. The problem is that these bite ramps are often used in class II division 2 cases, where the upper incisors are retroclined. What is your first reflex when you see retroclined incisors? Where would you apply the force if these teeth were in soft wax and you could move them with your thumbs? On the lingual surface, of course!
Think of an aligner covering these teeth. You want to procline them, so the force has to come from the lingual. Here’s the problem: when bite ramps are added in the aligner, it creates a prominent area on the lingual where there is no plastic in contact with the tooth. A place where you want force. A site that is critical for the mechanics you are planning, for the teeth’s proclination, or buccal torque.
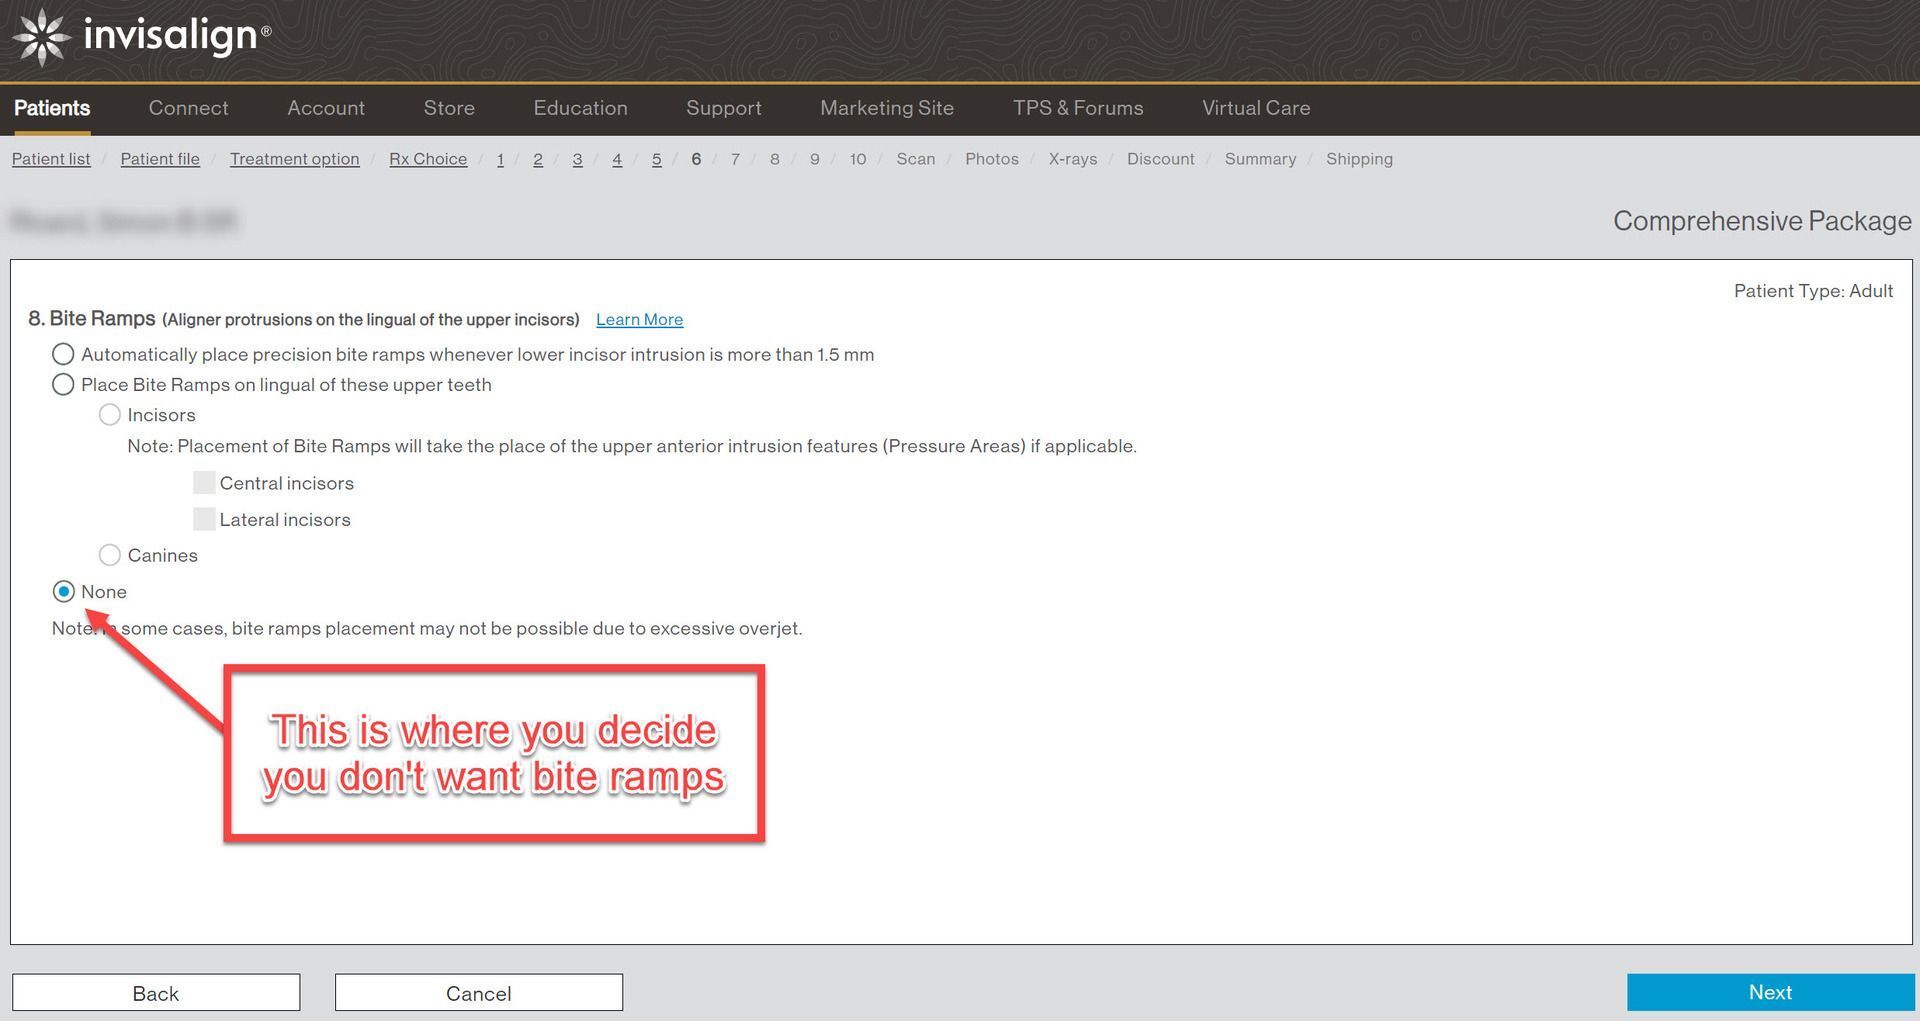
A lot of times, it is like second nature for the software to add bite ramps. When there’s a deep bite, the G5 protocol is applied. Resulting in adding bite ramps. When you fill the prescription, you can choose not to have any bite ramps. This should be your decision, not the software’s decision.


Placement of bite ramps
You can choose to place them on the incisors or the cuspids. Why would you choose one or the other? Depending on the overjet. The maximum length of the bite ramps is 3mm. If you have more than 3 mm of overjet, the patient will bite behind the bite ramps. This could even worsen the case. In such a scenario, you could place the bite ramps on the cuspid instead if you see in your analysis of the possibility that the lower cuspid would come in contact with them.
Stage your treatment
What can you do if you have retroclined incisors and you want to use bite ramps? Just stage your treatment. You could decide to push and procline the teeth first, and once they are in the proper position, you could add the bite ramp. That can be done. You stage your treatment; YOU are in control. This is why you always have to think of what you’re doing.
Remember: if you need force on the lingual surface,
you need to cover that surface.
Pushing on the lingual surface of the incisor with a bite ramp compared to pushing without a bite ramp would be like using the tip of our fingers instead of our whole hand. That’s the difference between having a bite ramp or not having a bite ramp. This is why you sometimes have to stop and think every time you work with clear aligners… or anything else!
Stop and think.
And you have to think like plastic. If you think like plastic, it’s going to help you. You’re going to have better results. Think of the force. Think of how you apply the pressure. And use this trick: imagine that the teeth are all in soft wax, and you want to use your thumb to move them. This comes from Dr. Gerry Samson. He’s full of tricks and wisdom!
Now that you know everything about bite ramps, are you going to use them or not? Maybe. But at least you will do it when it’s a good time to do it.
More on bite ramps and clear aligners features in the Anatomy and parameters of clear aligners course here.
Have fun Making the MOVE!
If you want to watch the video on our YouTube channel (and subscribe at the same time!): Click here
👉 Feel free to share this article with colleagues or peers who might find it intriguing.
Let’s stay at the forefront of advancements in clear aligner technology together!
Register for our courses today and embark on a transformative learning journey with The CLEAR Institute.
You want information on our courses, programs, and services? Book some private time with Dr. Stephane Reinhardt 👉 HERE 👈
You need help with your treatment planning, go 👉 HERE 👈
You need help with your cases, and you want personalized one-on-one private coaching? Book some private time with Dr. Stephane Reinhardt 👉 HERE 👈
Take your practice to the next level with our personalized 2-day in-office coaching—tailored for you and your team to master clear aligner integration together. 👉 HERE 👈
To learn more about our online and in-person training, here are the direct links:
✅ Online courses: https://bit.ly/CLEAR_online
✅ LIVE In-person classes: https://bit.ly/CLEAR_live
✅ MOCA programs: https://bit.ly/learning_programs
✅ YouTube channel: https://bit.ly/YTCLEARsubscribe
← Older Post Newer Post →


